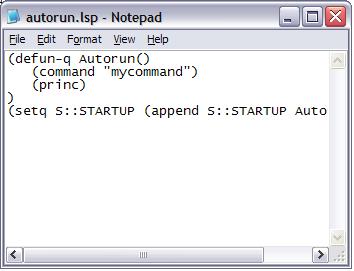
Building an NSIS installer for deploying a LISP or DVB file
 Yesterday, I posted about using NSIS to deploy to AutoCAD. Today, we will see how nice it is to create a simple installer. Not just any basic file copy one either, we will actually update the startup suite.
What we want to do:
We'll have to pretend a little for this. In this case, we'll pretend we have a simple HelloWorld.lsp file and a HelloWorld.dwg file. They need to be installed to the user machine, and ready to use the next time the user launches AutoCAD.
Solution:
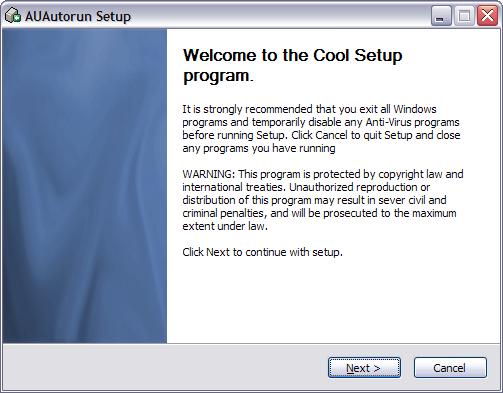
As the title to this wonderful blog post reads, we'll be building an NSIS installer. This will focus around a fictitious LISP program, but this technique works for DVB files or even ARX files. So, first things first, you'll need to have NSIS itself installed. Visit the nullsoft nsis homepage over at sourceforge and download the latest version.
Go ahead and look through the examples for building installers. The base installation of NSIS comes with several examples and several pages of topics.
To begin, we'll create a new text document, and rename it to HelloWorldInstaller.nsi. Inside, we'll write a couple lines to define the installer and version number. These will come in handy later:
!define VER_NUMBER "1.0.0"
!define PRODUCT_NAME "HelloWorld"
!define PRODUCT_PUBLISHER "InstallandDemand.blogspot.com"

Var "strRegistryAcad"
Var "strRegistryLoad"
Var "newAppKey"
These
!define tags are creating defined constants for us to use later, and the var are creating variable that we can modify for finding the startup suite location.Next, we'll need to create a few more settings that tell the installer things like what the product name is, and what to save the compiled installer as. In a sense, we are just setting the project properties.
; set project properties using the defined constants above
Name "${PRODUCT_NAME}"
BrandingText "${PRODUCT_PUBLISHER}"

; The file to write
OutFile "${PRODUCT_NAME}_${VER_NUMBER}.exe"

; The default installation directory
InstallDir "$PROGRAMFILES\${PRODUCT_PUBLISHER}\${PRODUCT_NAME}"
InstallDirRegKey HKLM "SOFTWARE\${PRODUCT_PUBLISHER}\${PRODUCT_NAME}" "ApplicationPath"
DirText "Choose a directory to install in to:"
The InstallDir and InstallDirRegKey tell the installer where to set our target directory on the target computer. It will try to read the InstallDirRegKey value in case the application has already been installed. Also notice, we used
${PRODUCT_NAME} constants to define some of the project properties and target directory.Finally, we are going to get to the meat of our installer. We will tell it what files need to be installed and where to install them. We will also search the registry to find the startup suite and make our new lisp program load on startup.
NSIS installs files in sections. It does this to allow multiple processes to be done and chosen by the person installing the software. In essence, we can create different sections, and based on options the user selects, different sections will be deployed. Our sample here is much to simple for this. We only need one section.
Section "Application (required)"
  ; install files
  SetOutPath $INSTDIR

  ; -- write prog dir
  File "HelloWorld.lsp"
  File "HelloWorld.dwg"
SetOutPath tells the installer where to copy the following files to. In this case,
$INSTDIR is an NSIS defined variable that is set by the InstallDir function above. File "HelloWorld.lsp" supplies the installer with the file to copy.Now before we finish this section off, we need to find the startup suite. AutoCAD stores its startup suite under a registry setting that is under HKEY_CURRENT_USER. Here, there is a NumCount string value that stores the count of items, followed by the paths to each of these items. We will read what the count of items installed is, increment that count, add ours to the registry and finally save the new count back.
; Location in registry where AutoCAD Appload loads files...
  ; This is hard location and will vary based onInstalled versions of AutoCAD
  ; This is Registry string is for base AutoCAD 2007 English and default profile
  StrCpy $strRegistryAcad "Software\Autodesk\AutoCAD\R17.0\ACAD-5001:409\Profiles\<<Unnamed Profile>>\Dialogs\Appload\Startup"


  ; This is the matching path to let Appload know to load programs
  StrCpy $strRegistryLoad "Software\Autodesk\AutoCAD\R17.0\ACAD-5001:409\Applications\AcadAppload"

  ; Change the switch to force loading new program with Appload
  WriteRegDWORD HKLM $strRegistryLoad "LOADCTRLS" 0x0000000f


  ; Read the number of loaded Applications in the Startup Suite
  ReadRegStr $R0 HKCU $strRegistryAcad "NumStartup"

  ; Increment the Count
  IntOp $R0 $R0 + 1

  ; Build new key name
  StrCpy $newAppKey "$R0Startup"

  ; Tell the registry which file
  WriteRegStr HKCU $strRegistryAcad $newAppKey "$INSTDIR\HelloWorld.lsp"

  ; Increment the NumStartup key in the registry
  WriteRegStr HKCU $strRegistryAcad "NumStartup" $R0

SectionEnd
Now, it looks a little cumbersome the way values are copied around, but its all good in the end. All that is needed now is a quick compile, which can be done by right clicking on the HelloWorld.nsi file and choosing "Compile NSIS Script".
So what did we do here? The installer, copies the files, reads the registry for startup suite information, updates said information, and finishes. The next time the user runs AutoCAD, your command or macro is now available.
This is a very simple look into building an NSIS installer, but with some more time and a little elbow grease, you can whip it into shape, make it so you can choose the profile to install to, add more files, update dialogs, and have lots of fun in the process.